

A large marble fountain can weigh hundreds or even thousands of kilograms, so a successful installation begins below ground. The foundation, concealed water lines, drainage, electrical preparation and stone assembly all need to work together before the fountain is filled for the first time.
At YouFine, we plan the foundation, component sequence, water circulation route and lifting method according to the fountain design. For larger projects, installation drawings and component references can also be prepared so the customer or local contractor can coordinate the site before the marble arrives.
The 13 steps below follow a practical installation sequence for a freestanding multi-tier marble fountain, from marking the site to the completed fountain.
Important: Foundation depth, reinforcement, drainage, plumbing, electrical work and curing requirements vary by fountain size, soil conditions and local codes. Large installations should be completed with suitable lifting equipment and experienced contractors.
Before Installation: What Should Be Prepared?
- confirmed fountain location and overall footprint
- reinforced concrete foundation design
- water supply and recirculation route
- drainage or overflow arrangement
- electrical supply and protected conduit for the pump
- reserved sleeves or channels for concealed pipes and cables
- stone-compatible sealant and waterproofing materials
- leveling tools and lifting equipment for heavy components
For large fountains, the most important rule is to finalize the underground utilities before the foundation is closed. Changing pipe routes after the concrete and stone work are complete is far more difficult.
Stage 1: Site Layout, Foundation and Concealed Utilities
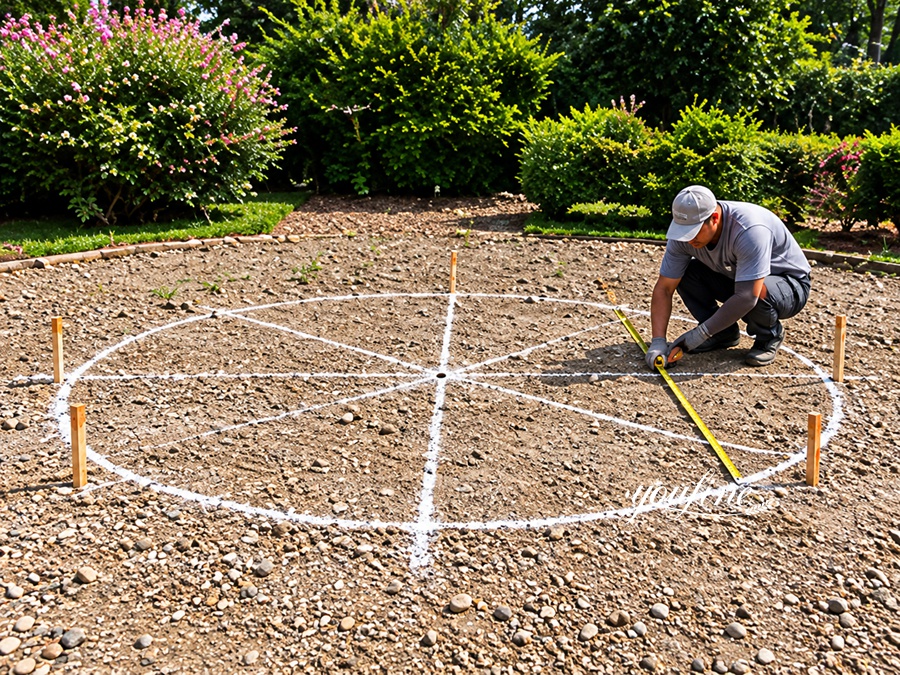
Step 1: Mark the Fountain Position
Determine the exact center and overall footprint of the fountain. Mark the basin diameter on the ground and confirm sufficient clearance for installation, maintenance and circulation around the finished fountain. For estate or hotel projects, also check the relationship to driveways, paths,
entrances and key sightlines.
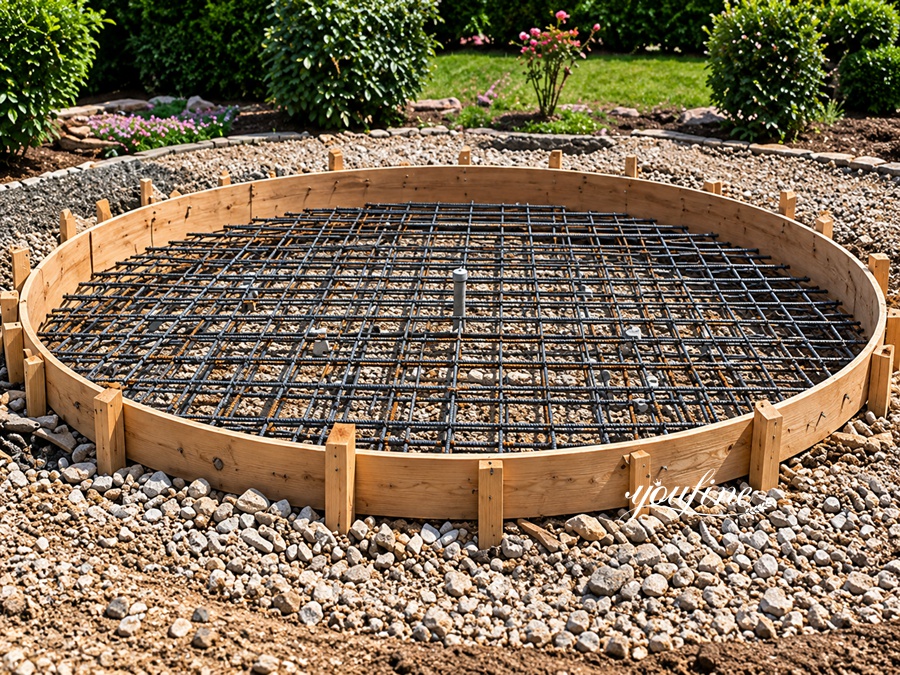
Step 2: Build the Reinforced Foundation
Prepare the excavation, formwork and steel reinforcement for the circular foundation. A large marble fountain should not normally be installed directly on soil, lawn or loose paving because settlement can affect the basin joints and the vertical alignment of the upper tiers. Reinforcement and foundation thickness should be determined according to fountain weight and site conditions.
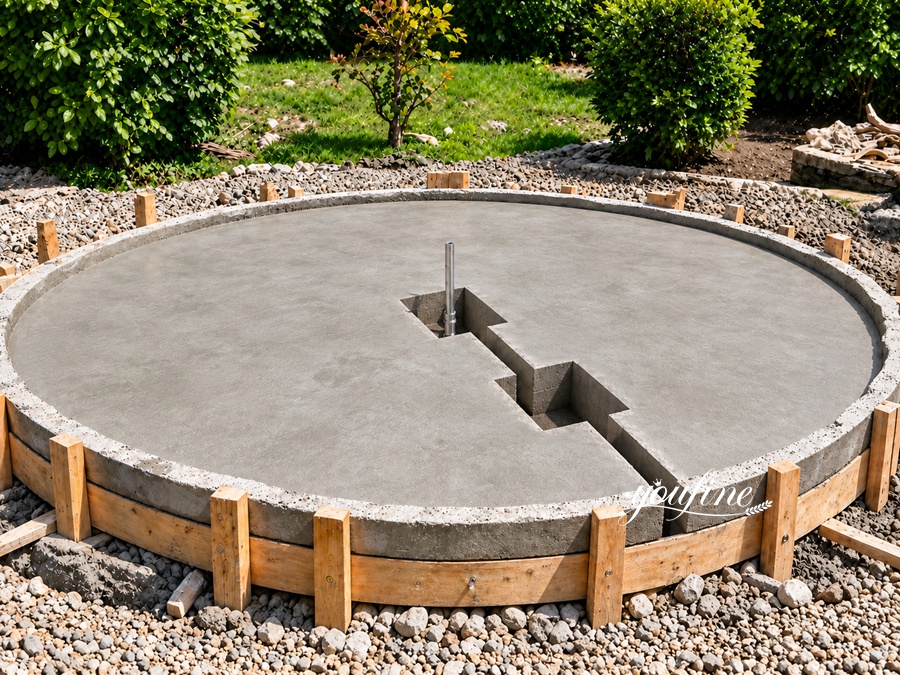
Step 3: Pour and Level the Concrete Base
Pour the concrete and carefully level the upper surface. At this stage, leave the required openings or service channels for the water line, drainage and electrical conduit instead of burying everything without access. The finished base must remain level because the bottom basin will follow this surface.
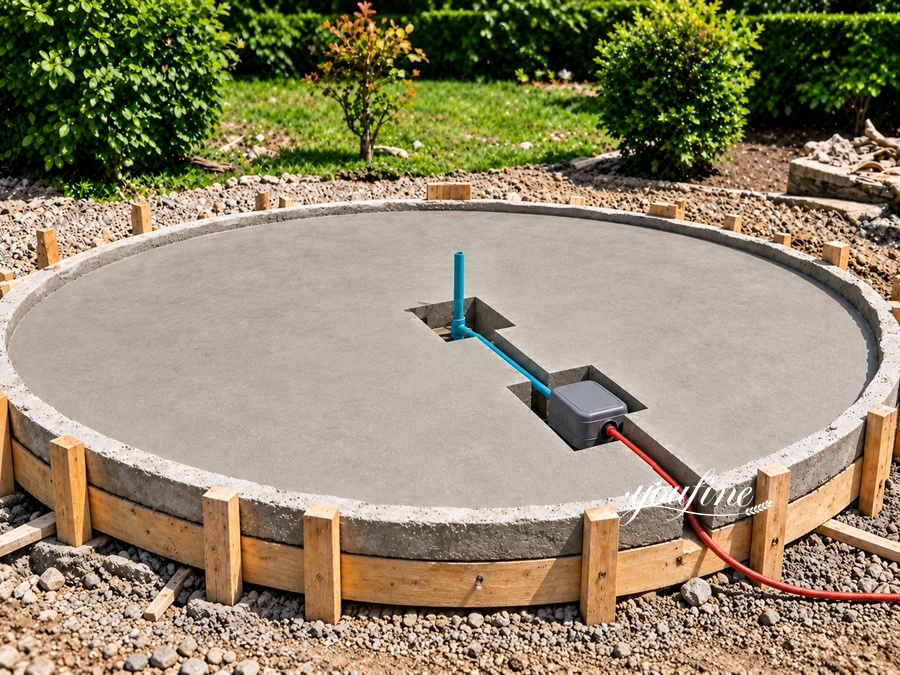
Step 4: Install the Concealed Water and Service Lines
Use the reserved channel to route the necessary pipework and protected service conduits toward the fountain center and service side. Keeping these utilities below the finished surface creates a cleaner installation and avoids exposed pipes around the fountain. Pipe sizes and routes should follow the circulation design for the specific fountain.
Step 5: Complete Drainage and Electrical Preparation
Before closing the foundation, confirm the drain or service opening, the central vertical pipe and the protected route for electrical supply to the pump or control equipment. Outdoor electrical work should follow local requirements and be completed by a qualified electrician where required. Any service box should remain accessible without leaving loose cables or pipes exposed across the finished landscape.
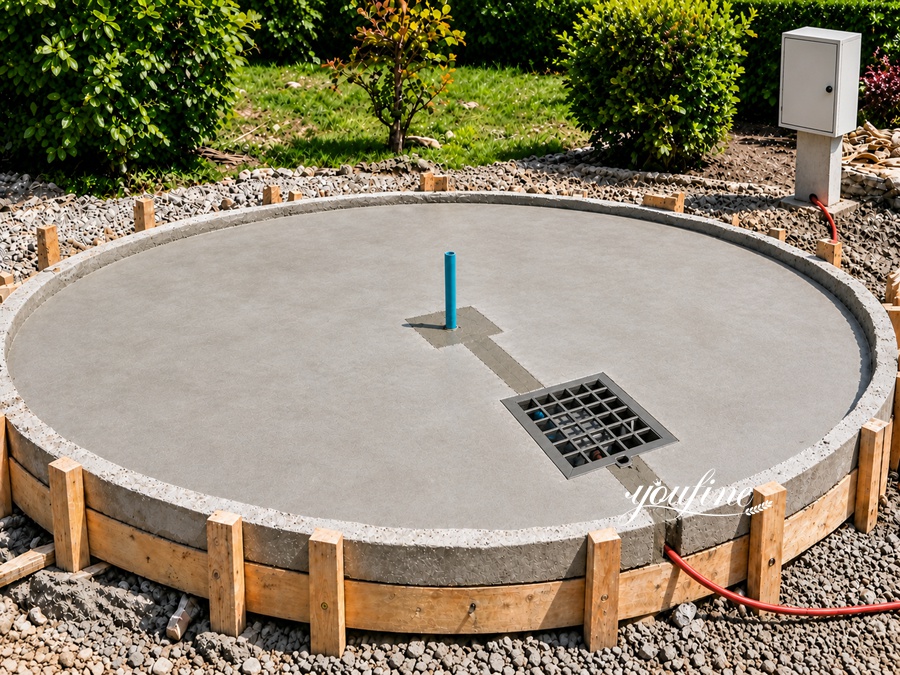
closed.
Step 6: Finish the Foundation Surface
Close the service channel, finish the concrete surface and remove the temporary formwork after the concrete has cured sufficiently. Recheck the center pipe, drain position, overall level and foundation diameter before any marble component is installed.
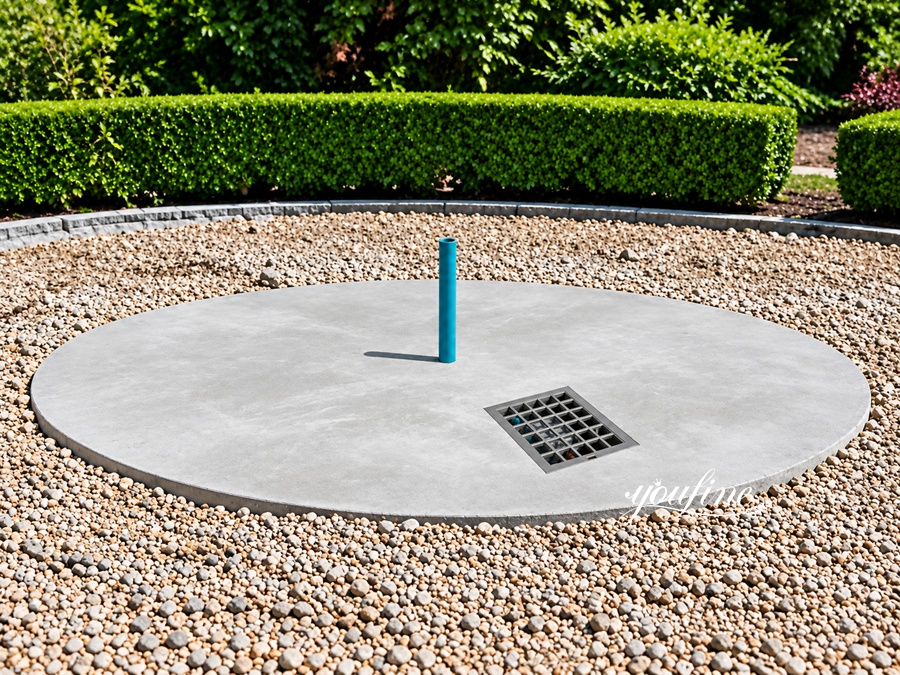
Stage 2: Install and Seal the Bottom Basin
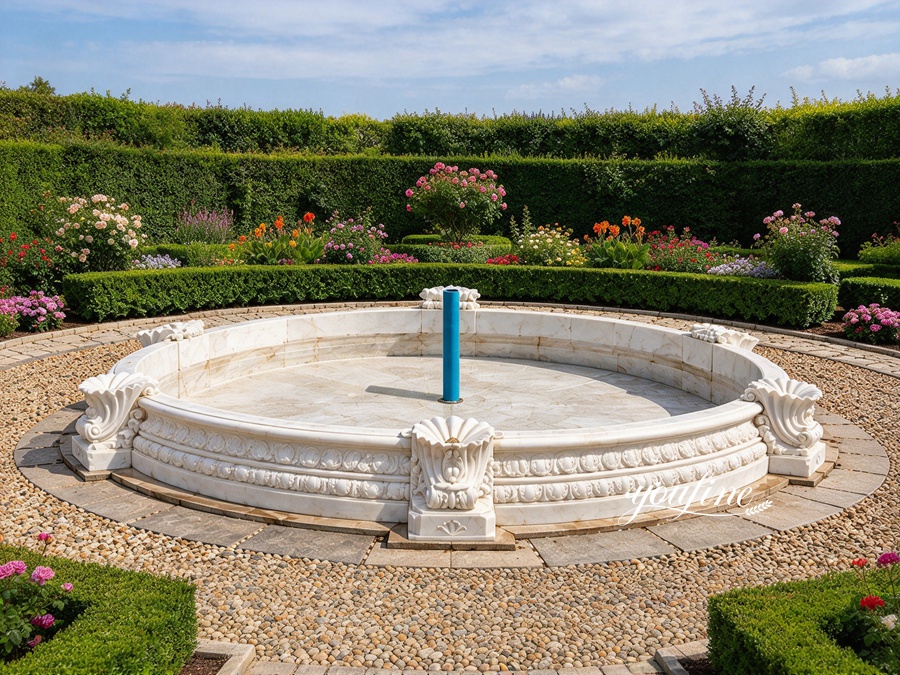
Step 7: Assemble and Level the Bottom Basin
Place the marble basin sections around the completed foundation according to their installation sequence. Adjust the joints and use a level to confirm that the pieces form an even circle without visible steps between neighboring sections. On carved basins, also check that decorative moldings and relief
patterns continue smoothly across the joints.
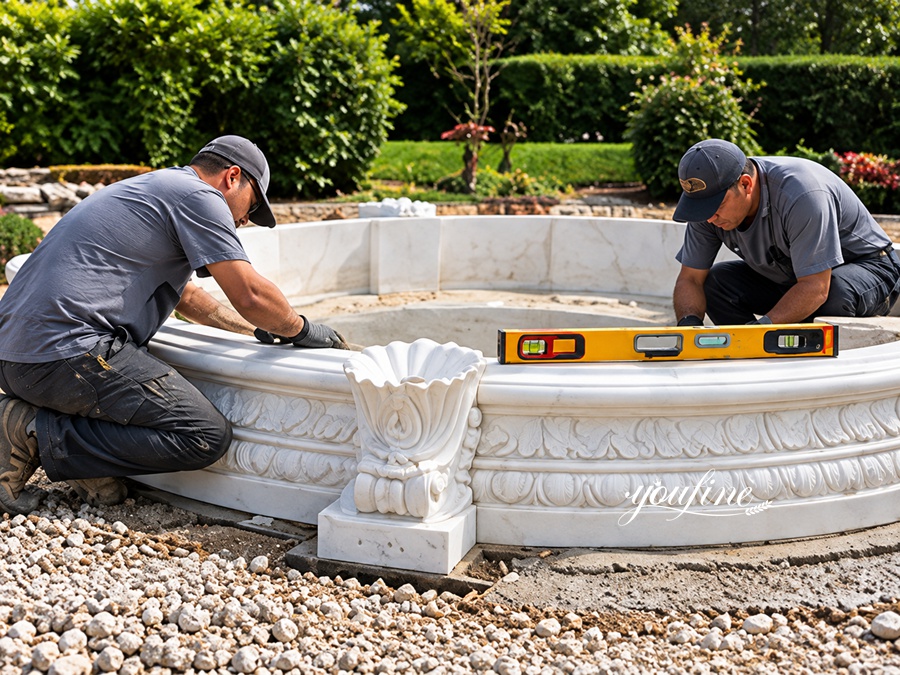
Step 8: Seal the Basin Joints
Apply a stone-compatible sealant to the joints between marble sections and around any relevant penetrations. The sealant should be suitable for natural stone and continuous water exposure. Avoid products that may stain or discolor the marble.
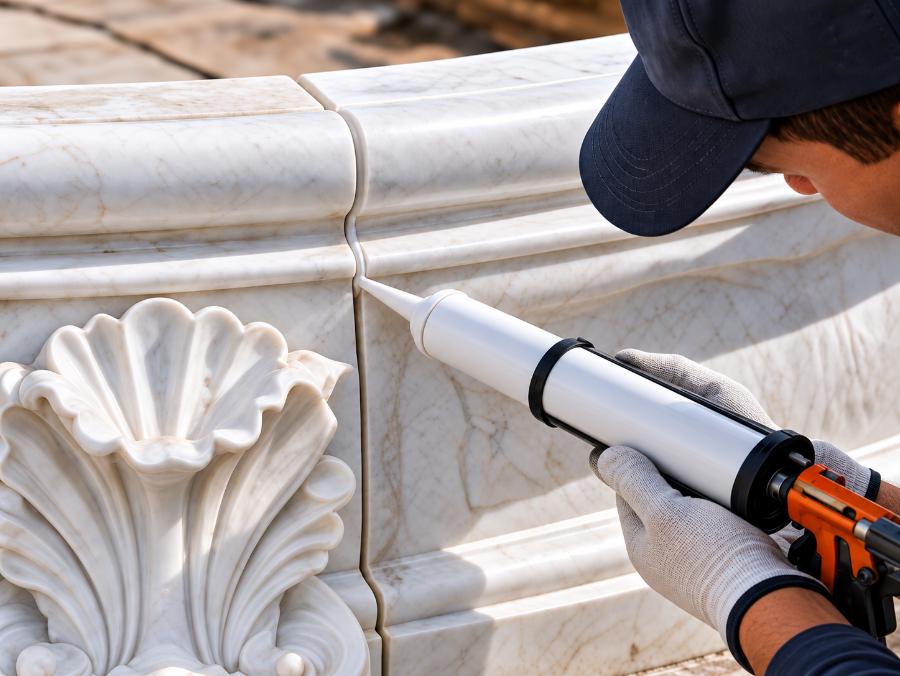
Step 9: Complete the Basin and Recheck the Center
After the basin is assembled and sealed, inspect the full circle, joint consistency, basin level, drain position and central pipe alignment. When practical, carry out an initial leak test before installing the heavy upper structure. This is the easiest stage to correct a joint or plumbing issue.
Stage 3: Install the Central Column and Upper Tiers
Step 10: Install the Central Column
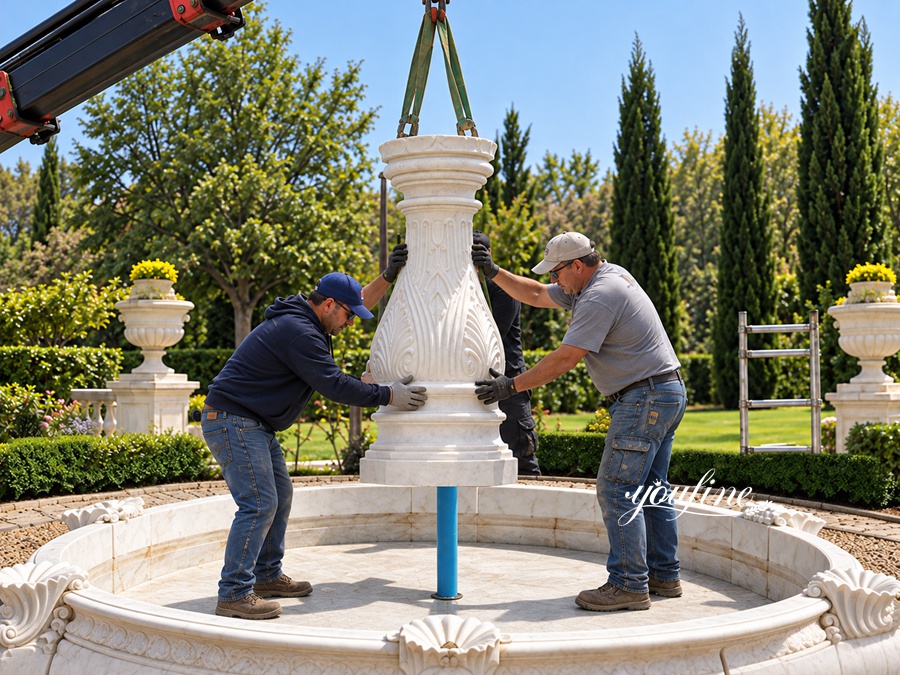
Position the first central pedestal or column exactly over the center line and concealed plumbing route. Use a level from several directions to confirm vertical alignment. Larger stone components should be moved with appropriate lifting equipment, and lifting straps should avoid delicate carved edges.
Step 11: Install the Large Water Bowl
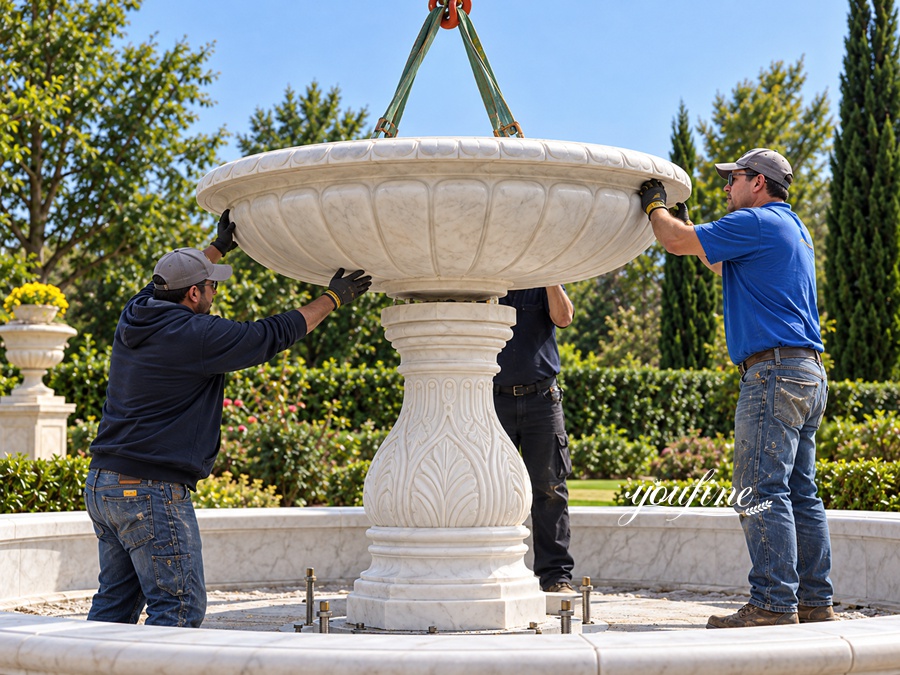
Lift the main water bowl onto the central column. Before releasing the lifting straps, check the bowl level, center alignment, joint fit and internal water line connection. An uneven bowl can produce an uneven overflow around the rim, so this check is important both structurally and visually.
Step 12: Install the Upper Tier and Top Section
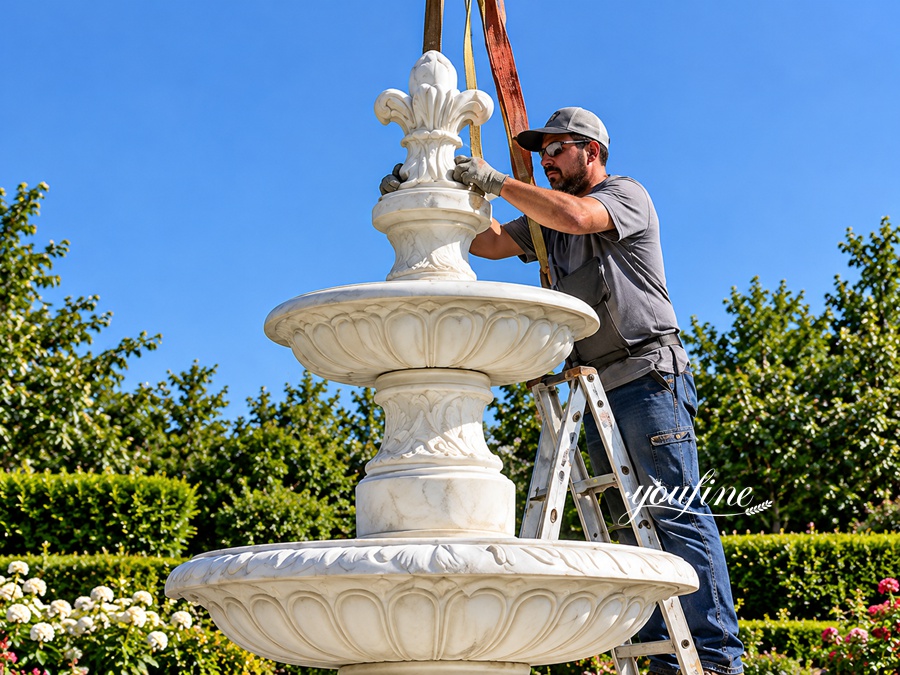
Continue assembling the upper column, smaller bowl and final decorative section according to the component sequence. Check the center line after each piece. Once the top is installed, step back and inspect the fountain from several directions for symmetry, bowl spacing, figure orientation and overall vertical alignment.
Stage 4: Final Filling, Water Test and Completion
Step 13: Fill the Fountain and Test the Water Flow
Clean construction dust and debris from the basin and outlets, then fill the fountain to the correct operating level and start the circulation system. The final test should check pump operation, water pressure, flow from each outlet, overflow symmetry, splash range, return circulation, basin water level and any sign of leakage. For a multi-tier fountain, small flow adjustments may be needed so the water falls evenly around each bowl.
If the fountain uses a separate pump chamber or control box, confirm that valves, electrical protection and maintenance access are all working before the installation is considered complete.
Where Should the Fountain Pump Be Installed?
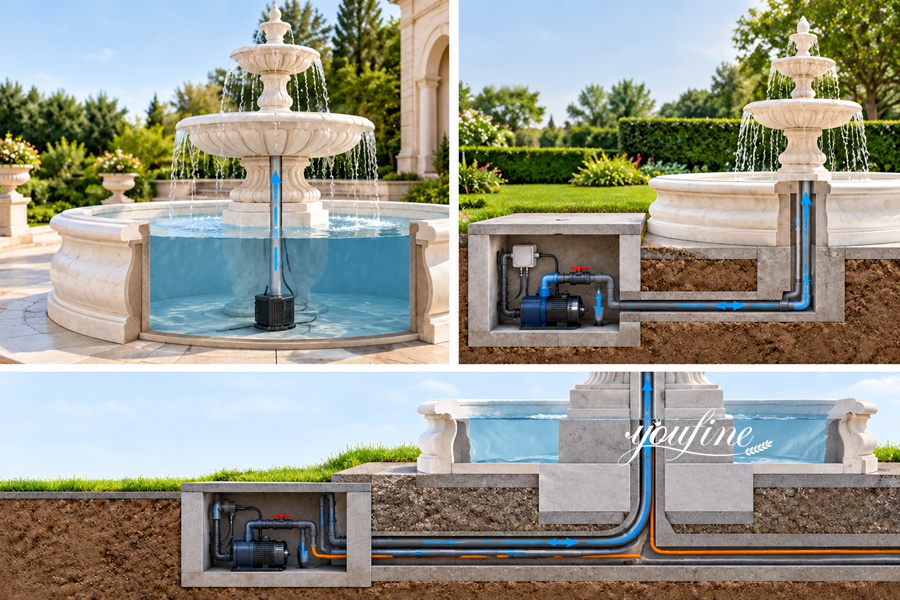
·Pump inside or near the basin – suitable for smaller or simpler systems, provided the pump remains accessible for cleaning and replacement.
·External pump chamber – often preferable for larger estate, hotel or commercial fountains because valves, filters and pumps are easier to inspect and service.
For larger projects, the pump location, return line, supply line and electrical route should be planned before the concrete foundation is poured. The concealed channels shown in Steps 3-6 are exactly why this planning matters.
Does a Marble Fountain Need a Continuous Water Supply?
Normally, no. Most decorative marble fountains use a recirculating water system. The pump draws water from the basin and sends it back through the supply pipe to the fountain outlets. The water falls back into the basin and repeats the cycle. Fresh water is mainly needed to replace losses from evaporation, wind, splashing and cleaning.
Common Marble Fountain Installation Mistakes
Installing on an unstable base: Uneven settlement can affect basin joints and the alignment of the upper fountain structure.
Closing the concrete before utilities are planned: Water lines, drains and protected electrical routes should be coordinated before the foundation is finished.
Leaving pipes or electrical cables exposed: Concealed routes and accessible service points create a cleaner and safer finished installation.
Skipping the basin check: When practical, inspect and leak-test the lower basin before adding the heavy upper
tiers.
Using unsuitable sealant on natural stone: Some products can stain marble or fail under continuous water exposure.
Making the pump impossible to service: Pumps, valves and controls will eventually need cleaning or replacement, so access must be planned.
Forgetting winter drainage: In freezing climates, water should be managed so it does not remain trapped inside pipes, pumps or fountain components.
Can You Install a Large Marble Fountain Yourself?
A small, simple fountain may be manageable for an experienced contractor or landscaper. However, a large multi-tier marble fountain usually involves reinforced foundations, concealed plumbing and electrical preparation, heavy lifting, stone alignment, sealing, pump installation and final water testing. For large estate, hotel, resort or commercial projects, professional installation is generally recommended. The installation team should also have suitable lifting equipment and experience handling heavy stone components.
How YouFine Supports Your Marble Fountain Installation ?
YouFine supports marble fountain projects from pre-installation planning through final assembly. Based on the fountain design, we can provide component references, overall dimensions, foundation information, basic plumbing layouts, reserved pipe positions, pump recommendations, and installation guidance before shipment.
For large or multi-tier fountains, we can also provide numbered component references, assembly sequence guidance, packing photos, trial-assembly records, and water-testing videos to help the local installation team understand how the fountain should be assembled and operated.
If the project involves a large estate, hotel, resort, public landscape, or other complex installation, we can discuss additional technical support according to the site conditions. This may include reviewing site dimensions and photos,and providing remote guidance during installation. Our goal is to help clients prepare the site correctly before the fountain arrives, reduce avoidable rework, and make the installation process more organized from foundation preparation to the final water test.
Find the Right Marble Fountain for Your Project
Whether you are planning a fountain for a private garden, estate entrance, hotel, resort, or commercial landscape, YouFine can customize the size, marble color, carving details, and water effect to suit your project.
Send us a reference image, preferred size, or site photo to get fountain recommendations and a detailed quotation. We can also provide basic installation references to help your local team understand the assembly process.